Cornish WebServices
Consultancy Ltd
16
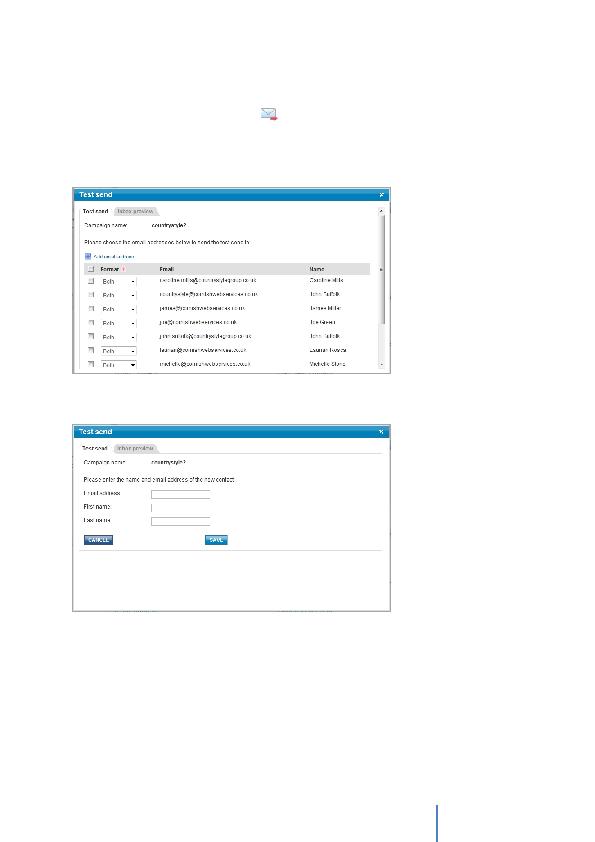
Test Send
You can start a Test Send by clicking on the `Test Send' button on the campaign summary
screen, or alternatively by clicking the
icon on the My Campaigns screen under the
Test Send column.
Any email addresses you have already uploaded to your test address book or entered
manually will appear in a list. This process is covered in detail under the Contacts section of
this guide. To enter an email address at this point, click on the `Add email address' link.
Enter the Email Address, First Name and Last Name for the Test Address and click on the
Save button. The Test Send screen will refresh and the recipient(s) you added will be
displayed.
Once you have tested your email, and ensured it is correct, you need to prepare your
contacts address book.
To select email addresses to receive the Test Send, check the box against each address.
You can select the Format of the email this address should receive. i.e. HTML, Plain Text or
Both. We recommend that you leave the selection as Both for your test sends.
Once the email addresses have been selected, click on the 'Send' button.
Once the Sending screen disappears, your test sending has been completed. You can now
check the mailbox(s) for the email addresses you selected to verify that your campaign
template appears as intended.